Introduction
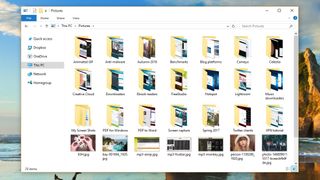
Finding your way around Windows Explorer can be a tricky business. Folders give you a tiny preview of the files within, but a tiny sliver of a document is rarely enough to tell you whether it's the one you need.
Keeping your files arranged in a logical system of folders will help, as will using a consistent method for naming them, but you could easily spend hours arranging them and end up with a vast, unwieldy system that takes forever to browse through.
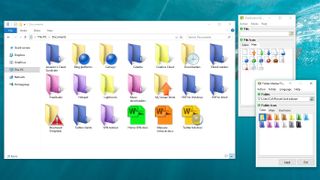
It would be much easier if you could label everything with a colour, as you can on a Mac. That’s where Folder Marker Free (opens in new tab) and FileMarker.NET Free (opens in new tab) come in. These programs let you assign colours to files and folders, and add extra symbols to indicate importance or progress. Here's how to get started.
- Want to make the switch to macOS? These are the best Mac tips
1. Do a little housework
Before you start color-coding, it’s worth taking a little time to tidy things up by deleting any files that you no longer need, including bits left over by software you’ve uninstalled. Also make sure your files are in the right folders (photos in Pictures, songs in Music and text files in Documents, for example).
Once any rubbish is removed, make a backup of your Documents folder on an external hard drive, or a cloud storage service like DropBox (opens in new tab).

2. Get Folder Marker Free
Once everything is organised and backed up, download Folder Marker Free (opens in new tab) (make sure you select the version on the right-hand side of the page) and run the installer.
When the program launches for the first time, click the Colors tab to see the different hues available for your folders. There are 12 options in the free version of the software, not including Windows' default manila colour.
3. Color your folders
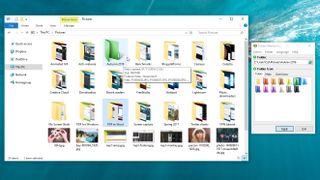
Click the small green '...' icon and choose a folder to colour, then click 'OK'. Pick a colour and click 'Apply', then open Windows Explorer to see the change.
You'll notice that coloured folders don't give you a preview of their contents like standard Windows folders do. That's because they're effectively replacing the dynamic 'live' icons with static images. Its a shame, but is the only drawback of Folder Marker.
4. Use special icons
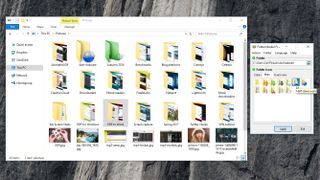
Folder Marker also gives you a selection of status icons to use. These include high priority, private, high importance, and half-done work. To use these, select a folder as you did in step three, then click the 'Main' tab and choose an icon. Click 'Apply', then check the results in Windows Explorer.
'Kullanıcı simgeleri' sekmesini tıklarsanız çok çeşitli başka seçenekler bulacaksınız, ancak bunların tümü Windows sistem simgeleridir, gerçekten klasörler için tasarlanmamıştır. Karışıklığı önlemek için bunları kullanmamak en iyisidir.
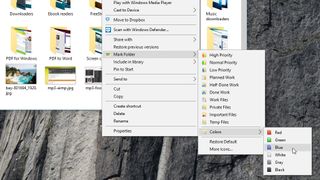
5. Bağlam menüsünü kullanın
Windows Gezgini'nde bir klasörü sağ tıklayın ve içerik menüsünde yeni bir seçenek göreceksiniz: 'Klasörü İşaretle'. Bu, size ana Klasör İşaretleyici arabirimi kadar çok renk ve simge seçeneği sunmaz, ancak daha hızlıdır ve bir işi bitirdiğinizde durum simgelerini güncellemenin uygun bir yoludur.
'Daha fazla simge' seçildiğinde tüm arayüz ortaya çıkar ve 'Varsayılanı geri yükle' yaptığınız tüm değişiklikleri geri alır.
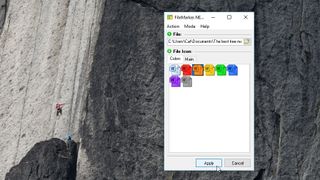
6. Dosyalarınızı işaretleyin
Klasörlerinizden memnun olduğunuzda, dosyalara geçme zamanı. Yine sağ taraftaki ücretsiz sürümü seçmeye dikkat ederek FileMarker.NET'i indirin (yeni sekmede açılır) . Yükleyiciyi çalıştırın ve bittiğinde programın başlamasına izin verin.
FileMarker.NET, Klasör İşaretleyiciye çok benzer, bu nedenle yeşil '...' düğmesine tıklayın, bir dosya seçin, tıklayın ve renklendirin ve 'Uygula'ya tıklayın.
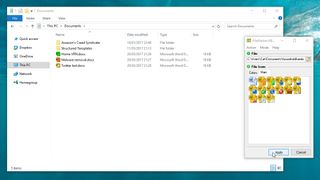
7. Durum simgeleri ekleyin
FileMarker.NET görüntülerle çalışmaz (simgeleri zaten tam olarak ne olduklarını gösterdiği için bu mantıklıdır), ancak normalde aynı görünen metin belgeleri, elektronik tablolar, veritabanları ve sunumlar için harikadır.
Yeniden renklendirilen dosyanızın nasıl göründüğünü görmek için Windows Gezgini'ni açın. Dosya simgesini yeniden renklendirmiş olsanız bile, ilerlemeyi ve önceliği belirtmek için dosyalara durum simgeleri de uygulayabilirsiniz.
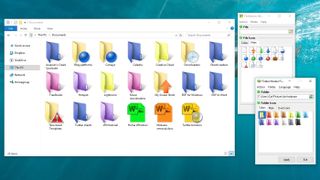
8. Kendi sisteminizi yapın
Artık dosyalarınızı ve klasörlerinizi size uygun bir şekilde organize etmek için ihtiyacınız olan tüm araçlara sahipsiniz. Geçen yılki fotoğraflarını ister misin? Kolay - hepsi, konuma göre sıralanmış mor klasörlerdedir. Yarın yapılması gereken sunuma ne dersin? Önemli olarak işaretlenmiş kırmızı çalışma klasörünüzdedir.
Bir daha asla Windows Gezgini'nde avlanmak zorunda kalmayacaksınız.
